How to use insulated terminals?
Insulated terminals are widely used in electrical wiring to ensure a safe, secure, and durable connection between wires and components. Their insulation not only prevents accidental short circuits but also protects against environmental factors such as vibration, corrosion, or moisture. Understanding how to properly use insulated terminals is essential for both safety and reliability.
Usage Process
1. Select the right terminal
Choose the type (ring, spade, butt connector, etc.) that matches your wiring needs.
Ensure the terminal size corresponds to the wire gauge (AWG) you are working with.
2. Strip the wire
Use a wire stripper to remove insulation from the end of the wire.
Strip only the necessary length (usually the depth of the metal barrel inside the terminal).
Avoid nicking or damaging the copper strands.
3. Insert the wire
Place the exposed wire fully into the barrel of the insulated terminal.
Ensure that all strands are inside and none are left outside.
4. Crimp the terminal
Use a proper crimping tool designed for insulated terminals.
Position the terminal correctly in the crimper and press firmly until it is tightly secured.
Do not use pliers or makeshift tools, as these may result in a weak connection.
5. Check the connection
Gently pull the wire to confirm that it is firmly held inside the terminal.
Inspect the crimp visually to ensure it is even and has not damaged the insulation.
6. Finish the installation
Connect the terminal to the appropriate stud, screw, or mating connector.
Tighten securely but avoid overtightening, which could damage the insulation.
Tips for a Good Connection
Use the right tool: A ratcheting crimper specifically designed for insulated terminals ensures consistent pressure and reliable crimps.
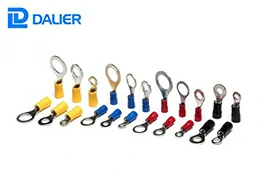
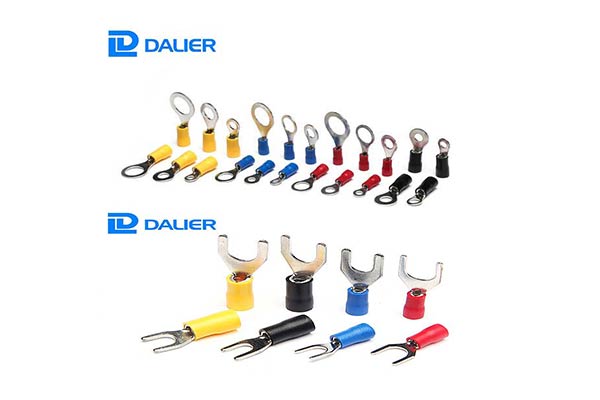
Match colors and sizes: Insulated terminals are color-coded (red, blue, yellow) for different wire gauges. Always match correctly to avoid loose connections.
Avoid over-stripping: Stripping too much insulation can leave exposed copper, increasing the risk of short circuits.
Ensure proper contact: The conductor must fully engage with the terminal barrel; partial insertion weakens conductivity.
Perform a pull test: After crimping, give a light tug on the wire. A secure connection will not slip out.
Protect against the environment: For outdoor or high-moisture areas, consider using heat-shrink insulated terminals for additional sealing.
Conclusion
Using insulated terminals correctly is a simple but vital step in electrical work. By selecting the right size, stripping the wire carefully, crimping with proper tools, and verifying the connection, you can achieve a safe, reliable, and long-lasting joint. Following the tips above will help ensure that your wiring projects meet professional standards and withstand the test of time.
FAQ
Q1: Why use insulated terminals instead of just twisting wires together?
A1: Insulated terminals provide a more stable mechanical hold and better electrical contact. They reduce the risk of loosening, oxidation, and short circuits—especially in environments with vibration or moisture.
Q2: What are the common types of insulated terminals?
A2: The most widely used types include:
Ring Terminal: Designed for screw or bolt fastening.
Spade Terminal: Allows quick installation and removal.
Butt Connector: Used for joining two wires end to end.
Quick Disconnect: For connections that require frequent assembly/disassembly.
Q3: What do the insulation colors mean?
A3: The colors indicate the wire gauge range (AWG) the terminal is designed for:
Red: 22–16 AWG (0.5–1.5 mm²)
Blue: 16–14 AWG (1.5–2.5 mm²)
Yellow: 12–10 AWG (4–6 mm²)